What are the Best Cell Phone Signal Boosters for Rural Areas?
Boosting your cell signal when you are in a rural area is not only important, but can be vital. Staying connected if you live out of town is often much harder than living within city limits. To keep in touch with loved ones or even clients you should make use of a signal booster.
Take advantage of our system design and installation services. Learn more or call us for a free consultation: 1-800-969-8189.
Why Is It So Difficult to Get Good Cell Phone Signal in Rural Areas?
So many of us rely on our cell phones to help us get through the day. We use them to stay connected with friends and family, to research, send business emails, have meetings and for emergencies.
Not having a strong, reliable cell phone signal can be a nightmare. This is especially true for those who live in rural areas, remote locations, and farms.
The main factors that interfere with cell phone signal strength are:
Tower Distance
If you live in a rural area, you're probably miles away from cell towers. Cell signal is strongest at the source (the cell tower) and weakens the farther it travels, hence the weak signal.
There are many tools you can use to find the nearest tower. You can use websites like CellMapper, Antenna Search.com and CellReception, or apps like OpenSignal.
Mother Nature
Usually, trees, mountains, hills, or some combination of the three surround houses in remote areas. Such geographical features block or weaken cell phone signal. As the signal travels through those obstacles to get to your phone antenna, it loses strength.
Building Material
The building material used to build your house could be the reason for poor cell phone signal. Material like brick, metal, tinted glass, and insulation can block out the signal.
How Can Cell Phone Signal be Improved in Rural Areas?
If you struggle to maintain a strong, reliable cell signal connection, you will definitely enjoy a cell phone signal booster.
A signal booster is a device that uses an outside antenna to capture existing outdoor signal. It is then sent to an amplifier to enhance the signal. From there an indoor antenna to rebroadcasts the boosted signal where you need it.
Benefits of a signal booster:
- Improves cell phone reception
- Faster internet speeds
- Reduces dropped calls
- Compatible with all cellular devices: iPhones, Androids, tablets, hotspots, etc.
- Works with all major US carriers: AT&T, Verizon, T-Mobile, Sprint, etc.
- Does not need WiFi or a landline connection
- Are completely legal FCC-approved cellular extenders
The Best Cell Phone Signal Boosters for Homes in Rural Areas
It's important to have a reliable cell phone signal in rural homes. You’re able to stay connected and reach first responders if needed. If you run your business from home, you won't have to worry about missing or dropping client calls. A home booster will help cut the frustration of not having a reliable cell phone signal.
Best Overall Signal Booster Kit for Large Rural Houses:
Cel-Fi GO X Smart Signal Booster Kit

Overview of the Cel-Fi GO X:
- Best for Large Homes and Offices
- Covers Up to 15,000 Sq. Ft.
- Up to +100dB Gain
- Best Single-Carrier Booster
The Cel-Fi GO X Smart Signal Booster Kit is one of the best carrier specific boosters for rural areas, boosting signal up to +100dB . You can switch between carriers - Verizon, AT&T, T-Mobile, and US Cellular - when you need to. The useful app lets you check your signal strength, gain, and signal quality.
Under the best conditions, the Cel-Fi GO X Smart Signal Booster covers up to 15,000 square feet. The indoor cell coverage area can vary based on the strength of your outdoor signal.
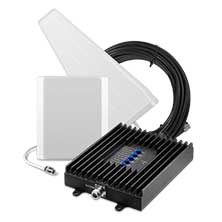
Best Professionally Installed Signal Booster Kit for Homes:
weBoost Installed Home Complete Signal Booster Kit

Overview of the weBoost Installed Home Complete:
- Great for Medium and Large Homes
- Covers Up to 7,500 Sq. Ft.
- Up to +72 dB of Gain
- Comes with a FREE Professional Installation
The weBoost Installed Home Complete is one of the most powerful signal boosters available. It's designed for medium to large homes in rural, remote, and urban areas. The booster offers a high-gain of 72dB, with 24 dBm uplink and 12 dBm downlink.
The signal booster can cover up to 7,500 square feet under perfect conditions. Coverage area can vary depending on your outdoor signal strength, which may be worse in rural areas.
If you're looking for only spot coverage inside and don't mind a bit of DIY, have a look at its sister product, the weBoost Home MultiRoom.
Best Medium Range Signal Booster Kit for Rural Homes:
SureCall Fusion Professional Signal Booster Kit
Overview of the SureCall Fusion Professional Signal Booster Kit
- Boosts Voice, Text, 5G, and 4G LTE Signals for All North American Cell Carriers
- Reduces Dropped & Missed Calls and Improves 4G LTE Data Speeds
- For Large Home or Office, up to 8,000 Sq Ft
- Lifetime, US-based Customer Service
Stay connected even in remote areas with the SureCall Fusion Professional. The best cell signal booster for mid-size buildings, it provides strong, reliable connections in areas up to 8,000 sq. ft. Significantly improve voice, text, 4G and LTE data speeds for all North American cell carriers with built-in 2XP technology. Double uplink transmission power for the best connection between your cell and the tower. Rural areas with weak cell signal will see significantly reduced coverage, but still in the 2,000-3,000 sq ft range.
For the next step up, you may consider the Fusion5s 2.0 Yagi/Panel kit.
Best Signal Booster Kit for Rural Homes on a Budget:
SureCall Flare 4G 3.0 Signal Booster
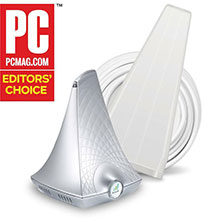
Overview of the SureCall Flare 4G 3.0:
- Best for Small Homes or 1-2 rooms
- Up to +72 dB Gain
- Covers up to 4,000 Sq. Ft.
- Complete Kit, Easy Install
- Supports Multiple Devices at the same time
The SureCall Flare 4G 3.0 Signal Booster works best for small homes or 1-2 rooms. The booster comes with an outdoor directional Yagi antenna, and a 2-in-1 amplifier/indoor antenna combo.
Cover up to 4,000 square feet under perfect conditions. Indoor coverage area will vary based on the available outdoor signal. Expect between 1000 to 2000 sq ft in a rural area.
If you're looking for spot coverage and you don't care for the modern design, try the SureCall Fusion4Home.
Best Professionally Installed Cell Phone Signal Booster for Commercial Buildings in Rural Areas
weBoost for Business Office 200 Installed

Buy this Cell Phone Signal Booster If:
- You have a large office or commercial space.
- You want total carrier coverage in your business.
- You want a booster that's professionally installed.
The weBoost for Business Office 200 Installed is a commercial strength booster for large spaces, even in rural areas. It can cover up to 35,000 square feet under best conditions, and comes with professional installation by OnTech.
This booster hits the sweet spot for businesses. It provides enough power for almost any commercial space, comes with professional installation, and has a competitive price point.
It has some weaknesses, however. First, it is made for areas with decent to strong outside signal. While installation is available, even in rural areas, it may not be optimal if you have weak outdoor signal. If that is the case, you will want a custom job.
For that, you can the regular Office 200 without installation, and give us a call for a custom antenna setup. We even offer professional installation services, if you still want to get it installed. With our service, you will get the signal you need, guaranteed.
Best Cell Phone Signal Booster for Enterprise Buildings in Rural Areas
Cel-Fi QUATRA 4000

Buy this Cell Phone Signal Booster If:
- You have a very large office building or commercial space.
- You need a booster with the maximum amount of power.
- You want a booster with a lot of bells and whistles.
The Cel-Fi QUATRA 4000 is an extremely strong industrial signal booster. It is made for commercial or industrial buildings but can be used in very large homes. It has many features, including remote signal monitoring and tweaking. It boosts all major carriers at a higher rate of power than any of its competitors, making it a no-brainer option if you’re looking to cover a very large space. It is our top recommendation for commercial buildings in rural or low-signal areas.
The Cel-Fi QUATRA 4000 is scalable based on how much area you’re trying to cover. It uses Network Units and up to 6 Coverage Units to cover all the way up to 200,000 square feet.
This cell signal booster requires a professional to install and design. We offer professional installation services with our in-house team of experts. This service is for commercial buildings only.
Best External Antenna Upgrades for Buildings in Rural Areas
Many signal booster kits include standard antenna options, like a Yagi or an Omni. While Yagi antennas yield better results than Omni’s in rural areas, there are situations where even a Yagi isn’t enough. If you have an extreme case where you need even more reach, using a high gain or ultra-high gain directional donor antennas will help.
Best Long Range Antenna For Rural Areas :
The Long Ranger – Ultra High Gain Parabolic Antenna

Overview of the Long Ranger:
- 5G Ready
- Reaches Over 10 Miles
- Up to +28 dBi Gain
- Works with ALL Cellular Carriers
The Long Ranger is the most powerful directional cellular antenna in the market. It’s perfect for rural environments with faraway cell towers. When a standard Yagi can’t get the job done, this bad boy will.
Get further reach with ultra-high gains of up to +28 dBi. Extremely directional, it has a radiation beam of about 10°. Under perfect conditions, it can reach cell towers located 10+ miles away. Enjoy drastic signal improvement in rural areas, as much as two bars or even a whole new network.
Best Medium Range Antenna for Rural Areas:
The Arrow LPDA – High Gain Directional Antenna
Overview of the Arrow LPDA:
- 5G Capable
- Reaches Over 5 Miles
- Up to +12 dBi Gain
- All-Weather Tested
The Arrow is another directional antenna made with rural areas in mind. With up to 12 dBi of gain, it's more powerful than a standard Yagi. It has a 30° radiation beam, making it easier to point at your closest cell tower. Under perfect conditions, it can reach cell towers located over 5 miles away. Capture cell signal from distant towers in all weather and receive superior in-building cell coverage.
It is similar to many TV antennas you may have seen. Its greatest advantage over the Long Ranger is that it is smaller and fits easily on any roof.
Best Cell Phone Signal Boosters for Vehicles in Rural Areas
Not only is it important to have a reliable cell phone signal at home, but also while on the road. People who live in rural areas, remote locations, and farms tend to have to drive longer distances. They are miles away from the nearest cell tower and surrounded by mother nature. A reliable signal is needed on the road for calls and navigation.
Best Overall Vehicle Booster Kit:
Cel-Fi GO+ Vehicle Smart Signal Booster

Overview of the Cel-Fi GO M:
- Great for RVs, Cars, Trucks, and Boats
- Up to 70dB Gain
- Powerful Single-Carrier Solution
- Complete Kit, Easy Install
If you need to stay connected while driving to or from rural areas, the Cel-Fi GO+ is one of the best cell phone boosters for RVs, cars, trucks, and boats. Connect to a single carrier at a time, providing vehicles with the highest possible gain of up to 70dB of signal.
The outdoor antenna will differ depending on which type of vehicle you will be using. Cars will use external magnetic mount antenna, boats will use a marine antenna, trucks and RVs will use OTR trucker antennas. Each outdoor antenna is designed to give the signal booster the highest amount of power.
You can use the Cel-Fi Wave app to check your signal strength, gain, and signal quality as well as update software.
Best Medium Range Vehicle Booster Kit:
weBoost Drive Reach Cell Phone Booster Kit

Overview of the weBoost Drive Reach:
- Great for Urban, Suburban, and Rural Areas
- 4G LTE and 5G Coverage for Entire Vehicle and Multiple Users
- Up to 50 dB Gain
- Complete Kit, Easy Install
The weBoost Drive Reach is weBoost’s most powerful in-vehicle cell signal booster for cars, RV’s and vans. It has an increased uplink output, meaning users can get signal that is 2x farther from towers for twice the signal strength. This is an increase of almost 5dB in uplink output power. We wouldn't recommend anything weaker for driving in rural areas.
The kit includes a mini magnet omnidirectional antenna, a low profile indoor antenna, and the Drive Reach amplifier.
If you drive a truck and want a dedicated signal booster, try the weBoost Drive Reach OTRn. Or, if you only have a few devices and are looking for something more affordable, check out the weBoost Drive Sleek 4G Signal Booster.
Best Vehicle Signal Booster on a Budget:
Surecall Fusion2Go 3.0 Cell Phone Signal Booster

Overview of the SureCall Fusion2Go 3.0:
- Boosts 5G/4G/LTE Data
- Works For All Major U.S. Carriers
- Increased uplink power for performance in rural settings
- Lower profile external antenna with stronger magnetic mount
The SureCall Fusion2Go 3.0 Signal Booster is one of the best signal boosters for vehicles, offering the best in vehicle-to-tower reach. It boosts 4G and LTE cellular signal in cars, trucks, vans, and SUVs. In addition, it works with all cellular devices and every cell phone carrier in the US, Canada, and Mexico. It is 5G ready.
The SureCall Fusion2Go 3.0 is powerful, reliable, and works well at a competitive price point. We definitely recommend it for people who are budget-conscious but still need to give their signal a little help while out driving.
FAQ’s
How can I boost my signal in a low signal area?
Buying a recommended signal booster is the best way to boost your signal. In low signal areas a booster will amplify the existing outside signal to give you more bars inside.
Do signal boosters really work in rural areas?
Absolutely. As long as you have outside signal, a signal booster will make it stronger. Remember that they only BOOST outside signal, they don't create it.
Are signal boosters legal for rural areas?
Yes. Signal boosters are legal in all areas of the US. They have set gain limits as per FCC regulations but are perfectly legal.
Would a signal booster work with an off grid system?
Yes a signal booster will work with an off gris system. As long as it has power from a battery or another source, you are good to go.
What carriers can I boost in the woods?
You can choose to boost only one carrier or many carriers. Multi carrier boosters will boost all main brands such as Verizon, AT&T and T Mobile.


