Antenna Handbook

Super J Antenna Calculator

 Here is a Super J antenna calculator:

Frequency (MHz): 145
Feed point height (m): 1

Element 1 length (m): 0.7071067811865475
Element 2 length (m): 0.3535533905932737

This calculator calculates the length of the elements of a Super J antenna for a given frequency and feed point height. The formula used is:

length = wavelength / 2 - feed_point_height

where:

  • length is the length of the element in meters
  • wavelength is the wavelength of the radio waves in meters
  • feed_point_height is the height of the feed point of the antenna in meters

The wavelength of the radio waves can be calculated using the formula:

wavelength = c / frequency

where:

  • c is the speed of light in meters per second
  • frequency is the frequency of the radio waves in hertz

For example, the wavelength of radio waves at 145 MHz is:

wavelength = c / frequency = 299,792,458 m/s / 145 MHz = 2.046 m

So, for a Super J antenna with a frequency of 145 MHz and a feed point height of 1 meter, the lengths of the elements would be:

  • Element 1 length = 0.7071067811865475 m
  • Element 2 length = 0.3535533905932737 m

This calculator is just a simple example, and there are many other factors that can affect the length of the elements of a Super J antenna. For more accurate results, you should consult a qualified antenna engineer.

do-it-yourself j antennas for 145 MHz drawings

 Here are some do-it-yourself J antennas for 145 MHz drawings:

  • J-pole antenna: A J-pole antenna is a simple and effective antenna that can be made from a few materials. It is a good option for beginners who are looking to build their own antenna.

To make a J-pole antenna, you will need:

* A piece of wire that is 1/4 wavelength long at 145 MHz.
* A connector for your radio.
* A way to mount the antenna.

The wire can be any type of metal, but copper is a good choice. The length of the wire will depend on the frequency you are using. For 145 MHz, the wire should be about 25 inches long.

The connector can be a BNC connector, PL-259 connector, or any other connector that is compatible with your radio.

The antenna can be mounted on a mast, a wall, or any other suitable surface.

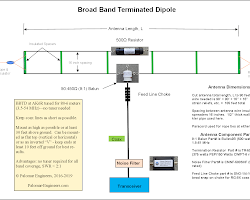
  • Terminated J-pole antenna: A terminated J-pole antenna is a variation of the J-pole antenna that has a resistor at the end of the antenna. The resistor helps to absorb the radio waves that are not transmitted or received by the antenna. This helps to prevent the antenna from radiating harmful interference.

To make a terminated J-pole antenna, you will need:

* A piece of wire that is 1/4 wavelength long at 145 MHz.
* A resistor that is rated for the power output of your radio.
* A connector for your radio.
* A way to mount the antenna.

The wire and resistor can be the same as for a standard J-pole antenna. The connector can be a BNC connector, PL-259 connector, or any other connector that is compatible with your radio.

The antenna can be mounted on a mast, a wall, or any other suitable surface.

  • Folded J-pole antenna: A folded J-pole antenna is a variation of the J-pole antenna that has a second piece of wire that is folded in half. The folded wire helps to improve the radiation pattern of the antenna.

To make a folded J-pole antenna, you will need:

* Two pieces of wire that are 1/4 wavelength long at 145 MHz.
* A connector for your radio.
* A way to mount the antenna.

The wires can be the same as for a standard J-pole antenna. The connector can be a BNC connector, PL-259 connector, or any other connector that is compatible with your radio.

The antenna can be mounted on a mast, a wall, or any other suitable surface.

These are just a few examples of do-it-yourself J antennas for 145 MHz. There are many other designs available, and you can experiment to find the one that works best for you.

It is important to note that building your own antenna can be a challenging project. If you are not comfortable working with electrical equipment, you should consult with a qualified amateur radio operator.

LW Antenna Design

A longwave (LW) antenna is an antenna that is designed to transmit or receive radio waves in the longwave band, which ranges from 150 to 525 kilohertz (kHz). LW antennas are typically large and cumbersome, as the wavelength of longwave radio waves is very long.

Here are some of the most common types of LW antennas:

  • Vertical antenna: A vertical antenna is the simplest type of LW antenna. It consists of a single vertical conductor, such as a metal rod or pipe. The length of the antenna should be one-quarter of the wavelength of the radio waves it is designed to transmit or receive.
  • Loop antenna: A loop antenna is a circular or elliptical antenna. It is made up of a single conductor that is bent into a circle or ellipse. The diameter of the loop should be one-half of the wavelength of the radio waves it is designed to transmit or receive.
  • Ground-plane antenna: A ground-plane antenna is a vertical antenna that is surrounded by a ground plane. The ground plane is a conducting surface, such as a metal sheet or a network of wires, that is placed below the antenna. The ground plane helps to improve the radiation pattern of the antenna.
  • Terminated antenna: A terminated antenna is an antenna that is terminated in a resistor. The resistor absorbs the radio waves that are not transmitted or received by the antenna. This helps to prevent the antenna from radiating harmful interference.

The design of an LW antenna depends on a number of factors, including the frequency band it is designed to operate in, the desired radiation pattern, and the amount of space available.

If you are planning to build an LW antenna, it is important to consult with a qualified antenna engineer to ensure that the antenna is designed correctly.

Here are some of the things to consider when designing an LW antenna:

  • Frequency band: The frequency band that the antenna is designed to operate in will determine the length of the antenna.
  • Radiation pattern: The radiation pattern of an antenna describes how the radio waves are emitted from the antenna. There are many different radiation patterns that can be used for LW antennas.
  • Space available: The amount of space available will determine the size and shape of the antenna.
  • Cost: The cost of the antenna will depend on the materials used and the complexity of the design.

Once you have considered these factors, you can start designing your LW antenna. There are many resources available to help you design an antenna, such as books, websites, and software programs.

Quad Beam Loop Antenna Calculator

Cubical Quad Beam Loop Antenna is fullwave length Antenna, designed in the mid of 1940's , each side being a quarter wavelength, and fed at a current loop in the center of one side, the voltage loops occur in the middle of the adjacent sides — and that reduces or eliminates the arcing. 

The background for the creation of the Cubic Quad Beam Antenna is due to the existence of shortwave radio stations located in the highlands. previously used a Yagi 
antenna which is more suitable for lowland, to transmit worldwide with high voltage input, This antenna is fed in the middle of the current loop, so the end is the 
high voltage loop. In the thin air of Quito, Ecuador,the high voltage at the tip causes a corona arc, and that arc periodically destroys the tip of the Yagi element. 
so Design station engineer Clarence Moore designed Cubical Quad Beam antenna to solve this problem.

Fig 1. Quad Loop Antenna


Fig 2. Quad Loop Antenna

The antenna shown in Fig. 1  is actually a quad loop rather than a cubical quad. Two or more quad loops, only one of which needs to be fed by the coax, are used to make a cubical quad antenna. If only this one element is used, then the antenna will have a figure-8 azimuthal radiation pattern (similar to a dipole). The quad loop antenna is preferred by many people over a dipole for two reasons. First, the quad loop has a smaller "footprint" because it is only a quarter-wavelength on each side Fig 1. Second, the loop form makes it somewhat less susceptible to local electromagnetic interference (EMI).
The quad loop antenna (and the elements of a cubical quad beam) is mounted to spreaders connected to a square gusset plate. At one time, carpets were wrapped around
 bamboo stalks, and those could be used for quad antennas. Those days are gone, however, and today it is necessary to buy fiberglass quad spreaders. A number of kits are advertised in the web.
The details for the gusset plate are shown in Fig.2 . The gusset plate is made of a strong insulating material such as fiberglass or in marine-grade plywood. 
It is mounted to a support mast using two or three large U bolts (stainless steel to pre- vent corrosion). The spreaders are mounted to the gusset plate using somewhat smaller U bolts (again, use stainless steel U bolts to prevent corrosion damage) 

Cubical Quad Beam Loop Antenna

The elements can be fed in the center of a horizontal side fig A, in the center of a vertical side fig B , or at the corner  fig C

There is a running controversy regarding how the antenna compares with other beam antennas, particularly the Yagi. Some experts claim that the cubical quad has a gain
 of about 1.5 to 2 dB higher than a Yagi (with a comparable boom length be- tween the two elements) . In addition, some experts claim that the quad has a lower angle of radiation. Most experts agree that the quad seems to work better at low heights above the earth's surface, but the differencdisappears at heights greater than a half-wavelength.


The quad can be used as either a single-element antenna or in the form of a beam. Figure Fig 3. shows a pair of elements spaced 0.13 to 0.22 wavelengths apart. One element is the driven element, and it is connected to the coaxial-cable feedline directly. The other element is a reflector, so it is a bit longer than the driven element. A tuning stub is used to adjust the reflector loop to resonance.
Because the wire is arranged into a square loop, one wavelength long, the actual length varies from the naturally resonant length by about 3 percent. The driven element is about 3 percent longer than the natural resonant point. The overall lengths of the wire elements are :

1. Driven element : L = 1005/F [MHZ] ft 

2. Reflector            : L = 1030/F [MHZ] ft 

3. Director              : L = 975/F [MHZ] ft 

with Shortwave Frequency range : 3 - 30 MHz, Center Frequency F[MHZ]  = 16.5 MHZ.


Quad Beam Cubical Antenna Calculator login form


Input Center Frequency (in MHz) for Quad Beam Loop Antenna

Quad Beam Loop Antenna Calculator

Input Center Frequency

Driven Element in ft
Reflector in ft
Director in ft
One method for the construction of the quad beam antenna is shown in Fig. 4. This particular scheme uses a 12 x 12-in wooden plate at the center, bamboo (or fiberglass) spreaders, and a wooden (or metal) boom. The construc- tion must be heavy-duty in order to survive wind loads. For this reason, it is probbly a better solution to buy a quad kit consisting of the spreaders and the center structural element.


WiFi router antenna, modem antenna, 23cm 5M omni directional antenna

Sale WiFi router antenna, modem antenna, 23cm 5M omni directional antenna
Inquiry to hadisyarief@gmail.com
Payment via Paypal
Specification:
Frequency Range: 698-960MHZ, 1710-2700MH.
Gain: 12 dBi
VSWR: <2.5 Polarization
Type: Vertical or horizontal
Radiation: Omni
Maximum Imput power: 10W
Input Impedance: 50 Ohms
Cable Type: RG58 50-3 cable
Cable length: 10 Meter
Demensions: about 23cm 63*63mm
Horizontal Half Power Angle: 360°
Vertical Half Power Angle: 70 15°
Lightning Protection: DC Ground Working
Temperature: -40°C-65 C
Connector: SMA male